Sunday, November 16, 2014

Sewing Bee - 2nd Round

Participating in this contest was an interesting experience.  Running a professional practice full time left no daylight hours for sewing during the course of the competition.  The specific requirements and short time frame was inspirational, though.

When this contest was announced., it was described as using mens' buttondown shirts.  I am old enough for this to mean traditional button down shirts - the kind with buttondown collars, not just button fronts.  I immediately thought of preppy oxford shirts in their traditional pastels.

The usual colors of oxford shirts:


 are traditional pastels:

and exactly the colors on trend this year for outerwear:

 These minimalist style coats  are a bold shape of pale color with a luxurious kind of simplicity,some with standing necklines.  The Jill Sanders yellow one top center  costs about $3000.00. The one on top left is Celine.  They are both oxford button-down yellow.
 At the same time, I love the same pale colors in other clothes, this season, with  flora and fauna embellishments.  This is Thom Browne
This Dolce and Gabanna skirt, though there is nowhere in my life into which it would fit, is divine.

In honor of the colors,  decided to make a minimalist bold  shape coat  from these shirts and see if it could look luxurious, despite originating at the Goodwill store.


It's amazing how little usable fabric is in four extra large shirts. 
I didn't have enough  for long sleeves, only three quarters, and not enough for a coat, only a short jacket.  I didn't have enough fabric for the same color front and back. I  looked at  a few patterns in the stash and this one seemed the most suited for a minimalist shape, about color,using smaller fabric pieces. 
  I  decided to secretly embellish the interior lining with some flora/fauna to please myself.  I searched my stash for something and found some scraps of birds, left over from upholstery.  The ones from my dining room chairs have colors that go perfectly!  Ready to go.

I had a lot of delay in starting my project  preparing the fabric.  Because I wanted  the soft brushed rich matte look of laundered cotton, I washed the shirts, which I think were permanent press so slightly glossy.  My washing machine has a "sanitize" setting,  a two hour hot cycle for things like musty linens, so I ran the shirts through that, then tumbled them dry, which took about 2 1/2 hours.  They I laid them out and cut the front pieces from the yellow and the back from the blue, reserving the long sleeves from the yellow for the sleeves.
 Looking at the pieces on the form I thought they were still a little too smooth looking, so I stayed all the edges of the cut pieces, and ran all the pieces, and the scraps, back through the harsh hot cycle, this time in company of a big acrylic blanket, then dried them. The fabric finish was now very matte and brushed.

I was surprised at how much I now loved the fabric and color.  I knew I should probably line it with old shirts, or use other shirt elements but by now I was enamored of my vision.

I used the long yellow sleeves for the sleeves, recutting the cap and keeping the top of the cuff opening as a slit but for the embellishment, I did not employ shirts.

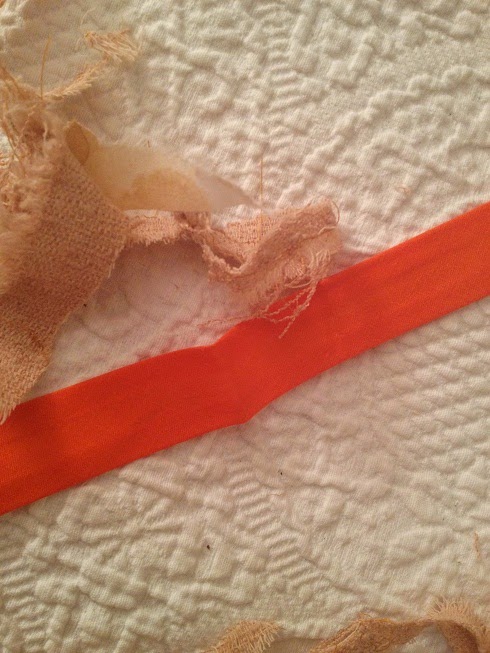
The rest of the construction was straightforward. Set in sleeves and lining cut from pattern pieces. I have a big stash of all purpose lining fabric in a sort of flesh color (grayed pinky-peach) which goes with most things, so I used that for the back areas and sleeves.  For the front of the lining, I made facings from the bird fabric, piecing the fabric together to get  full birds on the visible areas, interfacing them with a flexible interfacing, and finishing the edges with a vintage bias tape that was part of a lot of vintage notions from ebay.  It's yellow gingham print.

 I also used this for the button loop.
 I hand understitched the facings and linings and hand fininshed the lining.  I hung the jacket on the form, wet it, and finger shaped the drape of the neckline, steaming it a bit and letting it dry.

  I didn't want any stitching to show anywhere on the exterior of the coat.

I think this looks pretty luxurious, considering it's oxford cloth from Goodwill.

 Secret lining just for me.

Back
Closing
More pics:


Monday, November 10, 2014

Pattern Review Sewing Bee - All done

Thursday night and all done.  Here is the exterior:

Here is the interior:
Here is the pocket:
Here is the back:
This is the skirt front, on with hand in pocket:

Here is the skirt, dressed down:


I made a hand rolled hem because I was concerned that the loose weave would gap with a heavier hem:


Here is the review on patternreview.com

Made it through to the second round. Hope it's not something crafty.  I don't wear crafty well.


Thursday, November 6, 2014

Sewing bee - finished.

Well, that's it.  Finished. 

I'm very happy with this.  It looks luxurious, which it should given the number of hours it required for a simple skirt.

Of course, it doesn't photograph well. Here are the essentials:

Pockets:

She looks happy, or just relieved.  Pocket close up:


Here's the Chanel version:

I made a hand finished narrow hem, because the loose weave of the fabric threatened to leave gaps if any given thread was asked to carry any weight. 
The closing is a large old fashioned button to cap off the vintage mental skirt zipper:

I think this looks like something I would get at the designer consignment shop.  Very luxe and vaguely vintage.  I'm quite pleased.


Surprise Sewing Bee - heading for the wire - kinda


Wednesday, after dinner, 7:30 to 10:00, some time to work on the project.

 I had to make a decision.

Putting side seam pockets into an a line skirt made from a boucle fabric that turned out to be fray-crazy, heavy, stretchy and droopy, I was feeling like one of those project runway contestants who tackle things they never actually accomplished before - and we viewers all think - are they nuts?

 Well, okay, the point of joining the project, I tell myself, is to pursue your design vision within the confines of the assignment- and use fabric and patterns you bought at some time.  You must have believed they have potential.  Make it work!
Side Seam Pocket inspiration, from Top Shop, though mine is a narrower more traditional A Line.
At this point, my lining and skirt are mostly together, the pocket fronts are stayed and placed and potentially non-droopy,  provided the waistband stands, like iron, at the waist so  the ease I put in for the pockets, over the hips (read "over the rear end"), lands exactly where it should, so the pockets aren't pulled open.   I mean, my skirt is NOT going to hang from my hipbones like this one from Theory that is one of my inspirations:

The waistband absolutely has to fit, and the big irreversible decision, given the unforgiving nature of the fabric, is seaming the top of the pockets the few inches up to the waist.  Thereafter, the fit cannot easily be adjusted.  Not only that but, because the fabric is bulky, it's hard to  size by trying it on before you trim the bulky seam allowances at the pocket tops - but with this fabric, you cannot mess around after trimming seam allowances or it will fall to shreds.   I think I used up a whole spool of thread just stay stitching every possible thing already. 

Here is a piece of staying/binding with a trimming that demonstrates how immediately the loosely woven fabric turns to filaments.


Earlier in the day, before going to the office, around 6:30 a.m. or so, I was drinking coffee and reading Vogue Sewing about waistbands (again.)  I never use waistbands. I also never read Vogue Sewing at 6:30 a.m.  but new experiences is the point of the contest.  You can see I haven't finished the Sunday NY Times crossword yet either.  It's been that kind of week.
I then searched online about staying waistbands and ended up at Sewaholic where she discussed a very solid form of waist stay for a vintage dress.   The technique involves adding a strong stay ribbon with two rows of stitching, through all seam allowances, which will remain, to bolster the waist.  I liked this idea  because the fill for the waistband would make it stronger and also somewhat plusher, which seems to fit the style of fabric, and using a strong wide stay would allow me to ease the hip area into the stay, and give me the ability to redo additional fitting in case the pockets pull, without having to rip stitches out of the fragile fabric of the waistband.  Any adjustments could be made with the stay. Hooray!  Well, theoretically, hooray.  Will this work?

Had to position the lining and seam it to the top of the skirt, then trim and stay stitch once again, which I can also use for easing. 


Might as well use bright orange for cheeriness, since it's about 9:45 p.m.  And what the heck else am I going to use this 1" tape for?  I don't even know why I have it. Here is the stay, eased on at the back.  My pic of this is a hundred times messier than sewaholic's.  I haven't trimmed the threads  yet but you can also see the fray craziness.

Well how about that?  It actually holds up AND the pocket is hanging straight in the seam just as it is supposed to.  Whew.

Tonight, finishing the whole thing.  Ever hopeful.